Wednesday, October 1, 2014

Happy October!

 This is definitely the best time of year, especially here in the midwest, the weather is still in the 70's and 80's and the nights are cool. Every fall I get excited, I want to buy school supplies and dig out all my cardigans and scarves! Unfortunately its still too hot for that, but not for long! This past week I've been getting out my decorations and eating and drinking anything 'pumpkin spice' flavored. Here's what we've been doing lately:
Trying to limit my intake of pumpkin spice kisses. Delish!
Moccasin time!

Spray painting pumpkins, so fun!
Baking so many yummy things! I had to give away half of this cake so that we wouldn't eat too much.

Happy fall friends!

~Merry

Monday, September 22, 2014

DIY Baby quiet book

 
  Soft books are great for little bittys, especially if you are a book lover and want your kids to be, starting them out small is always good. I made one up out of scraps I had lying around and it turned out to be super fun! I chose animals for mine, but you could easily change it to colors, shapes, food, cars, whatever. Here's how I made mine:

  First choose a variety of fabrics for your cover and pages, I made six pages of coordinating colors. Cut six pieces of fabric into a 13 by 7 inch rectangle, each one will be two pages. Fold in half to find the middle and mark with chalk or a straight pin. Draw and cut out the designs in felt, I chose to do a few layers but not too much detail or you'll be at it forever sewing all those little pieces together.
Pin the pieces on to each side of the rectangle. Be sure to leave at least an inch of room around each edge.
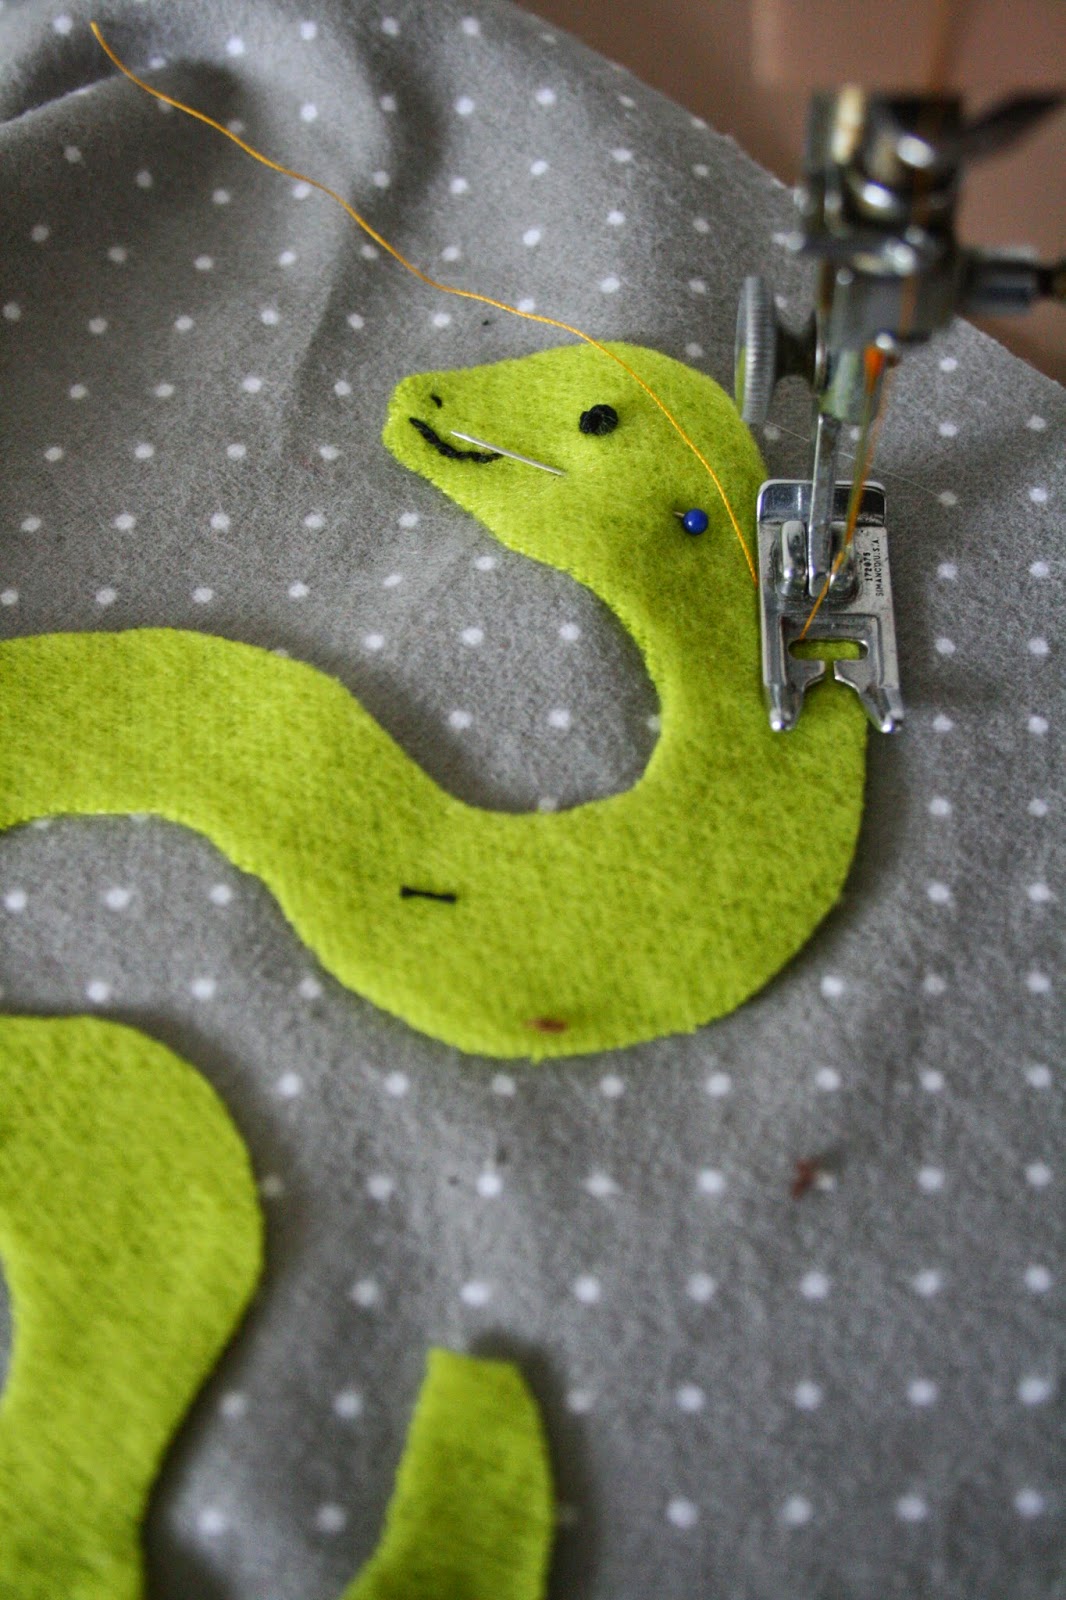
Some of the smaller pieces I stitched on by hand, it just makes it easier, and also the face details. Once you are happy with the placement, use the machine to stitch down. I used contrasting thread to give it some pizzazz.
Once you have stitched down all the designs lay the rectangles on a single layer of quilt batting and cut out three pieces. Now you are going to stack together two pages and one of the batting, this part is a little tricky, stack the two pages right sides together then lay down the batting on top and stitch all around about half an inch, be sure to leave a few inches open to turn.

Turn right side out and hand stitch the opening closed. Next, decide what order you want your pages in and stack on top of each other making sure the cover is on the bottom. Find the middle and sew and straight line through all layers all the way down. And you're done! Ta-da! Now your little one is ready to play with their new quiet book!


Happy sewing!

~Merry

Saturday, September 13, 2014

DIY's to try

  So this week I have fallen off the ball, actually I'm not sure I even got on it to begin with. You know those days when you have really high expectations and you plan to do so much and start all kinds of projects, and then, its three o'clock in the afternoon and you're still in your pajamas looking at Pinterest? This has been one of those weeks. The weather here went from 85 and sunny to the next day being 58 and rainy, its just hard to get motivated on those days. So, that being said I did not plan ahead on what to write about this week, I thought I would do a DIY, but I'm not prepared. Instead here are a few that I PLAN on doing sometime in the future.
This bunny lunch bag just may be the cutest thing I've ever seen!
I'm thinking these cozies from Mollie Makes would be great Christmas presents.
I've been wanting to make some curtains for my living room and I'm really liking these ombre ones from Lovely Home Idea on etsy.
I've been planning on making these for months and I finally bought the fabric.

Hopefully in the next week I can accomplish a few of these. Happy Saturday!

~Merry


Saturday, September 6, 2014

Weekly rehash

This week I have been trying my best to keep up with Ma Ingalls, its the end of summer and I have been given so many veggies I'm up to my elbows in salsa! You're going to get sick of seeing tomatoes but I promise they won't last forever. Here's a little peek at my week.
 Look at these beauts!
 Lunch!
 And of course robots, robots and more robots!
                         I think this one is just the sweetest!

Thanks for looking!

~Merry

Saturday, August 30, 2014

The Fashionable Lionheart

  The town I live in here in mid-Missouri has a population of just a little over 200. The next town over is about 3000, as you can imagine we don't have a lot of options when it comes to shopping. Pretty much the only place to buy baby and kids clothes is Carters or Children's Place, now don't get me wrong, I love those as much as any other mom, but they just don't have the variety, and if you don't want your kid to look like everybody else's what do you? There are pretty much two options, shop online, and holy smokes are there some super cute handmade kids clothes out there! Or, option number two: D.I.Y. The latter is the route I usually take, baby clothes are pretty small and don't take much fabric and the possibilities are literally endless! In the future I hope to post a few patterns, but for now here's a few I've done.
1.                                                                               2.
                                           3.
The first one was super easy, just use fusible webbing to iron on any design to a onsie, draw in the rest with a sharpie and you're golden! The other two I made up myself.
Thanks for letting me share!

~Merry

Wednesday, August 27, 2014

Happy Halloween?

  Summer is winding down and what that means for me is holiday robots are under way! I hate to think about Halloween and Christmas this early but the truth is I have to get started WAY early in order to stock up. Here's what I'm working on now, some repeats from last year and hopefully some brand new ones for this year.
Teeny Weeny Holloweeny Dracu-Bot
Wee Dracu-bot

 Franken-Bot

Teeny weeny Halloweeny

 What new things would you like to see?

~Merry

Saturday, August 23, 2014

Etsy Treasures

I don't know about anyone else, but I LOVE browsing Etsy! Its one of my favorites! I don't buy very often, mostly just drool and wish I was talented enough to make every single thing on there! Here's a few things I've been looking at lately.
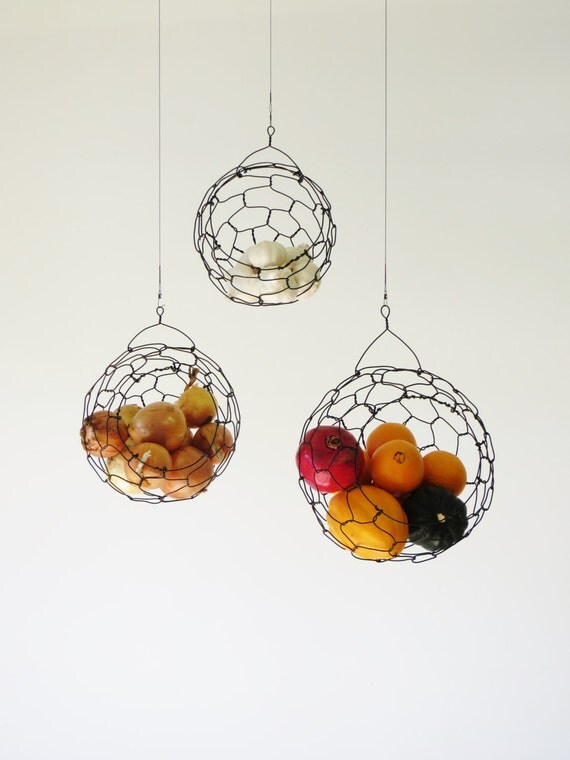
These hanging baskets from CharestStudios are the best!
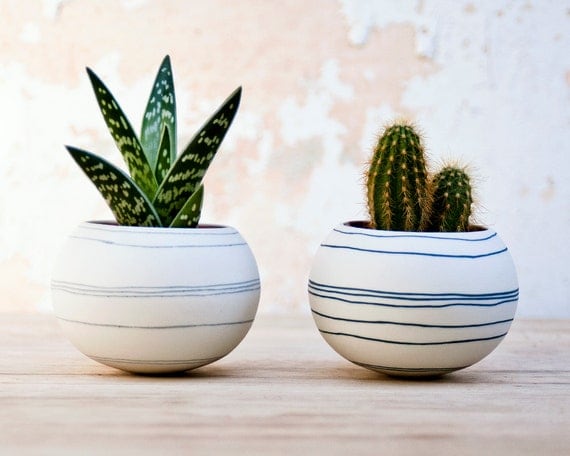
colorful porcelain planter (light gray stripes). Ceramic planter for, cactus, succulent or air plant. Crafted by Wapa Studio.
Someday these planters from Wapa will be on my window sill.
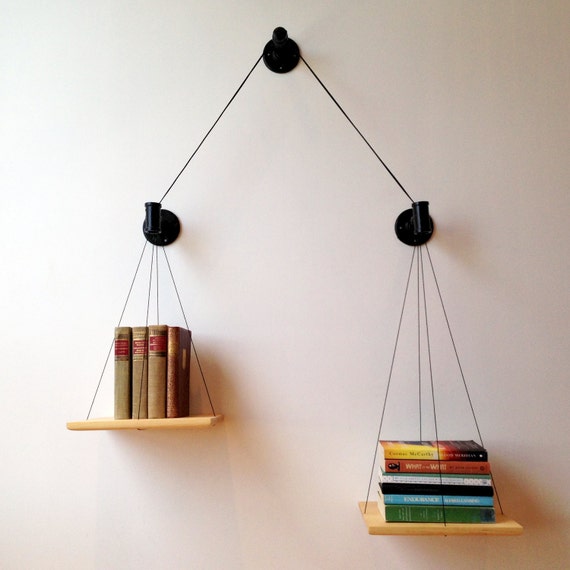
Black Balance Bookshelf
Genius book shelves from Cush Design Studio.
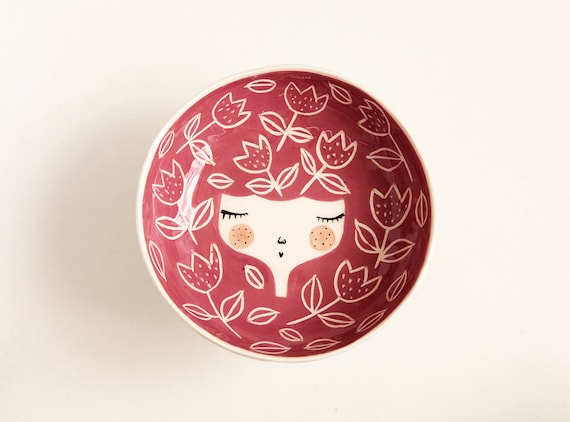
Ceramic serving bowl - red serving bowl - face illustrated bowl in Dark Red colour - face plate -  MADE TO ORDER
This little bowl from Marinski Handmade is just too cute to pass up!
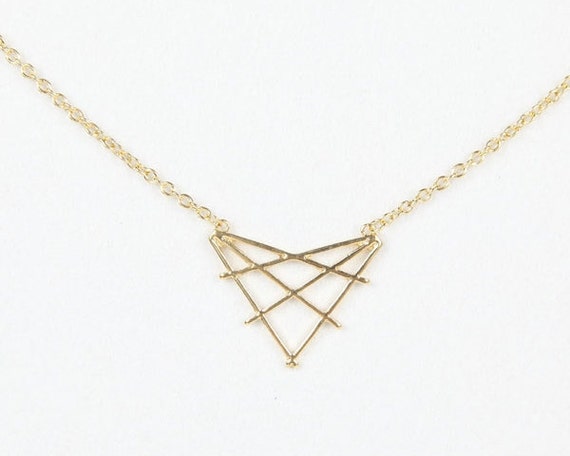
Cutout triangle necklace, geometric pendant necklace, cute necklace, woman necklace, JR0657
Just a little something fun for me. Geometric necklace from Bluedrib.
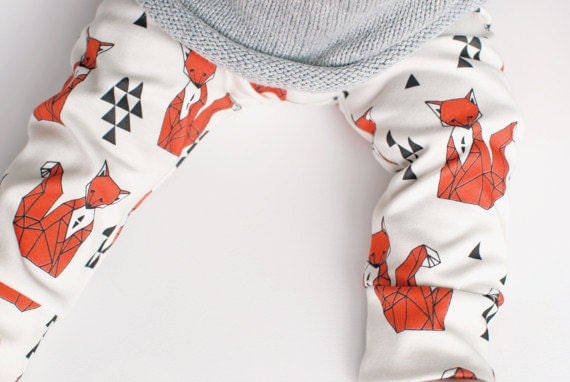
Organic baby leggings in geometric foxes
And last but not least some awesome leggings for the baby by Lola and Stella.

Hope you enjoy!

 ~Merry

Saturday, August 16, 2014

Homemade Vanilla Frozen Custard

Hello! Happy Saturday!
 Today I want to share my favorite homemade ice cream recipe, I don't have an ice cream maker but that doesn't stop me! Nothing beats homemade ice cream in august! This is for classic vanilla custard, but the great thing is you can add any other flavorings you want! I put fresh cherries in mine but you can definitely use peaches or strawberries, chocolate chips, anything!
Ingredients:

1 whole vanilla bean
1 1/4 Cups of milk
4 egg yolks
6 Tablespoons of sugar
1 Teaspoon of cornstarch
1 1/4 cups of heavy cream

 Using a small sharp knife split the vanilla bean lengthwise. Pour the milk into a heavy saucepan, add the vanilla bean and bring to a boil. Remove from the heat and let sit for 15-20 minutes to let the flavor infuse.
    Lift out the vanilla bean, holding it over the pan scrape out the black seeds with the dull side of a knife so that they fall back into the milk. You"ll need to whisk the beans into the milk a little as they tend to clump up some. Set the vanilla bean aside and return the milk back to a boil.
  Whisk the egg yolks, sugar and cornstarch until the mixture is thick and foamy. Gradually pour in the hot milk, whisking constantly. Return to the pan and cook over low heat, stirring constantly, you don't want the custard to stick or burn to the bottom.
  When the custard is thick and smooth pour it into a bowl, let it cool then chill in the refrigerator or freezer.
Whip the heavy cream until it is thick but still falls from the spoon, you want it fluffy but not quite like whipped cream that you would buy. Fold it into the chilled custard and pour into a freezer proof container. Freeze for about three hours, beat it with a fork add chopped fruit or chocolate and then freeze again. Stir it with the fork every two to three hours after until it is firm enough to scoop. Now go call up some friends, start up the grill and enjoy your homemade custard!

*Note: If you are using an ice cream maker, skip whipping the cream and just pour it and the custard into the ice cream maker and follow the manufacturers directions.

Saturday, August 9, 2014

DIY Painted flower pots

Apparently tiny window gardens are all the rage right now, especially little cacti. Maybe because the are so easy to grow. So, in order to not blend in with the crowd too much you have to personalize yours! Today, I will show you how I hand painted some terra cotta pots for my plants. I like to use the clay pots because they are super cheap and easily customizable. Here we go!
Step one: gather your materials.
1. assortment of clay pots
2. small paint brush ( not too small, about 1/2 - 1 inch)
3. masking tape
4. round price stickers
5. All purpose paint ( I like to use Martha Stewart's multi-surface craft paint )
6. chalkboard paint
Step two: Tape off the design you like. For mine I did triangles with the masking tape, polka dots with the price stickers and I also made one with chalkboard paint so I could write on it. If you are painting just the rim be sure to tape under the lip of the pot so it has nice clean lines.

  Once you have your design taped off, paint the area not taped. Let it dry for about an hour and then apply a second coat. Let it dry completely before removing the tape. I would recommend several hours.
Step three: Remove the tape, add your plant and enjoy!
~Merry

Tuesday, August 5, 2014

Amature gardening

 For the past few years I have attempted to do a small ( I mean tiny ) amount of urban gardening. You know, herbs, cherry tomatoes, house plants. Most of them have all died. I thought growing cactus would be easy, lots of sun, a little water, low maintenance, easy peasy! Not so much, I somehow killed those too. (Turns out you can't leave them out in the winter.) So this year I have a bigger yard and a little more determination, I have some big tomatoes, sweet pepper, herbs, house plants and outdoor flowers, so far I have only killed one plant! Yay! Thanks to my parents, I have some wonderful farm fresh fertilizer that does wonders!


~Merry

Friday, August 1, 2014

Welcome! Again.

Hello!
  Welcome to my blog! A few years ago I made a fatal attempt at blogging, thats why you will see some posts before this, just ignore those. Anyway, the blogging bug has bit me again, so we will try round two! This time around I hope to share in my adventures of being a new mama, cooking, sort of gardening, photography, DIYs and life here in mid Missouri. I hope you enjoy!